Cable display systems - wall mounted or floor-to-ceiling kits

Cable display systems comprise acrylic pockets together with the necessary cables and fittings. The fittings consist of floor and ceiling anchors which grip and tension the cables, together with clips to hold the pockets in place, securing them to the cables. The same fittings can be used for a wall mounted cable display or for cable window displays. We offer cable display kits with two different cable attachment methods: Classic and Gripper. Read more...


Classic and Gripper - what's the difference?

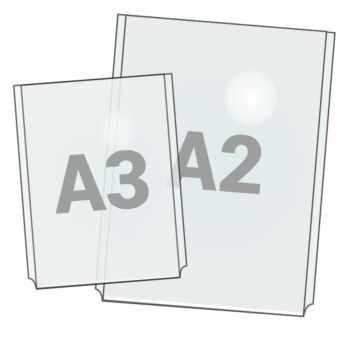
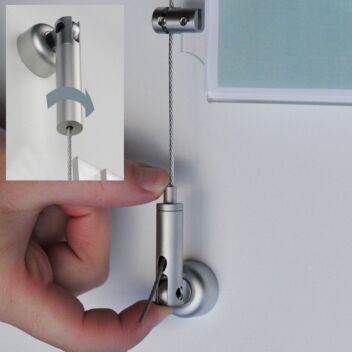
The difference between our Classic and Gripper kits relates to the way the clear acrylic poster pockets are attached to the cables. With our Classic cable kits the pocket position is set by tightening small grub screws. With Gripper kits the height can be adjusted simply by sliding the pockets up the wires - the Gripper side clamps grip automatically without the need to tighten. To lower, simply depress a small button to release the grip and readjust the pocket height to suit.

Suspended cable display systems

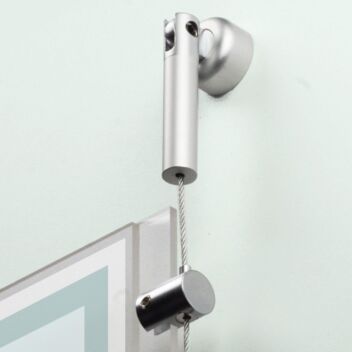
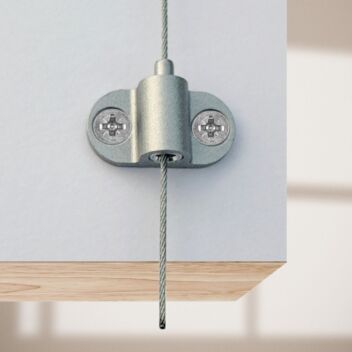
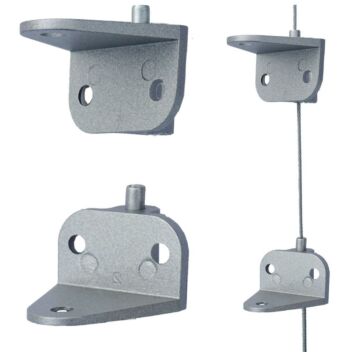
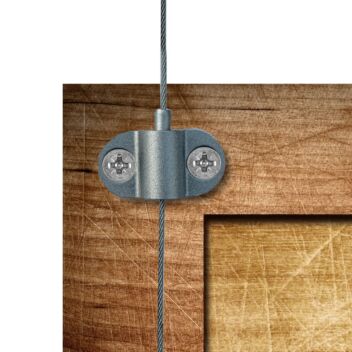
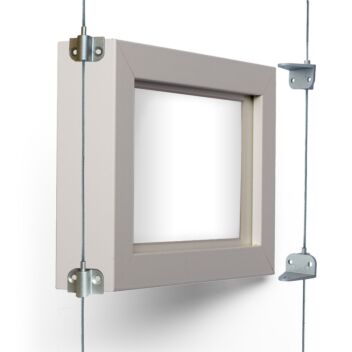
Our cable anchor fixings and fittings used to hold the acrylic pockets are unique to Green Magic.  They have been specially designed by us to offer aesthetic styling combined with unusual versatility and rapid installation. This is achieved by the swivel feature incorporated into the top and bottom cable anchor fittings. The result is that our cable kits can easily be attached either to the wall - or fixed floor to ceiling, for example in cable window displays.

Get inspiration from this case study

See our Blog post describing how a small independent beauty salon used our cable display kits to make an impressive wall display of eighty A4 certificate frames : Cable display ideas for a beauty salon.

Wire display system using acrylic pockets and special fittings

The basics of our cable display systems for windows or walls:

  • Cable display is just another name for a wire display system. The cables or wires are made of strong slender steel to provide an unobtrusive support. The wires are supplied with a cylindrical termination bonded onto the top of the cable. This vertical support wire is installed securely in the upper ceiling or wall fixing. The fitting incorporates a spring for tensioning.
  • The lower anchor fitting incorporates a gripper mechanism - the wire simply needs to be inserted and pulled tight.  The wire is grabbed automatically.  This is a superior solution to most competitor systems in which a separate lower termination has to be fitted by the installer at exactly the right height for the room in question.  This can be very fiddly and is unecessary in our cable display systems.
  • The acrylic pockets supplied with our kits are then fitted between the wires using small silver metal fittings which are attached to the perspex pockets using little grub screws tightened by means of an allen key (hexagonal wrench). With our Classic kits the height is also adjusted with a secondary grub screw which locks onto the cable. However in our Gripper cable display kits the secondary grub screws are replaced by a self locking gripper mechanism concealed within the fittings. The only part which shows is the push button for easy height adjustment where the cable enters at the top of the fitting.
  • All cable fittings have a matte silver finish which gives a discreet contemporary look.
  • Our cable kits come complete with wires, pockets and all fixings. Kits are available to order online in many pocket sizes and configurations. However, the individual components can also be purchased if you want to create a special design or are looking for spare parts for cable displays.

How to install cable display systems

Cable displays need to be fixed securely and setting out must be done accurately. Often installation is regarded as a job for the professional or keen DIYer. A reasonable level of practical skill is required. The tools needed are an electric drill, screwdriver, tape measure, good wire cutters and preferably a spirit level. More detailed assembly instructions are provided adjacent to the individual products in this section.

As the cables need to be tensioned the top fixing cannot normally be attached to a suspended ceiling - in this case the wire must pass through and attach to the structural ceiling above the false ceiling.  In all cases the responsibility of anchoring the cables rests with the installer as we cannot determine what type of wall or ceiling will exist at your premises.

For more detailed information please read the Assembly and Installation tab on the respective cable kit product page.